Water Tank Cleaning Process Explained Step by Step
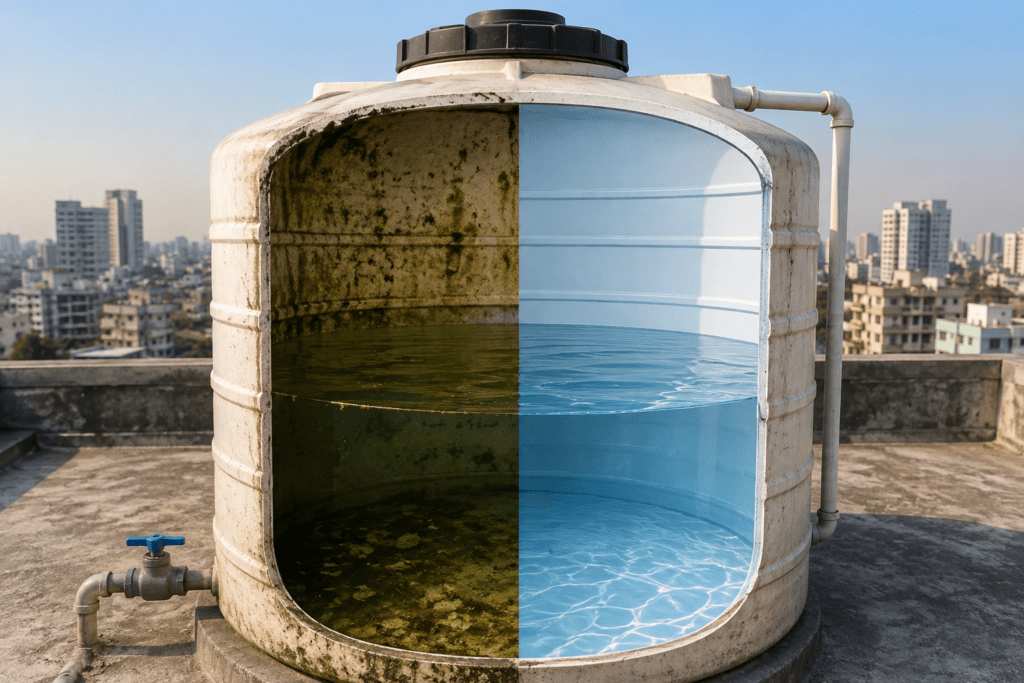
Water Tank Cleaning Process. The water tank is a crucial component of the water supply system in your home, office, school, or hospital, as you use the water daily for drinking, cooking, bathing, and cleaning. Over time, sediment, sludge, algae, bacteria, and rust particles accumulate inside the tank. If these are not removed in a timely manner: Water quality deteriorates. The plumbing system is adversely affected. The risk of water contamination increases. That is why professional tank cleaning is essential. While many people realize that water tanks need to be cleaned, few are aware of the correct process for doing so.
Why Is Professional Water Tank Cleaning Important?
Your water tank might look clean from the outside, but the reality inside is often different. After months of continuous use, dirt and contaminants settle at the bottom and cling to the walls.
- Professional cleaning offers the following benefits: Removing Sludge and Sediment: Accumulated silt, debris, and sludge are cleared away.
- Eliminating Algae and Bacteria: Algae growth and disease-causing germs inside the tank are destroyed.
- Improving Water Quality: The water becomes cleaner and of better quality.
- Preventing Foul Odors: Unpleasant smells emanating from the water are eliminated.
- Extending Tank Lifespan: The tank remains in good condition for longer, increasing its durability.
- Enhancing Plumbing Performance: Debris does not clog pipes and taps, ensuring smooth water flow.
- Maintaining Hygienic Water Storage: The tank stores clean and safe water. Regular tank cleaning ensures that the water reaching your taps remains safe and clean at all times.
Step 1: Initial Tank Inspection
Technicians first thoroughly inspect the tank to assess the following:
- Sludge Accumulation: The thickness of the accumulated sludge.
- Sediment Deposits: The amount of silt and debris settled at the bottom.
- Algae Growth: The extent of algae buildup on the walls.
- Rust or Corrosion: Presence of any rust.
- Cracks or Leaks: Any cracks in the tank or water leakage.
- Damaged Covers: Whether the tank lid is damaged or broken.
- Insect Activity: Presence of insects or pests inside.Overall Tank Condition: The general state of the tank. This inspection helps determine the most effective cleaning method and identifies any necessary repairs or maintenance.
Step 2: Water Supply Isolation
Before cleaning begins, the water supply connected to the tank is temporarily isolated. This prevents fresh water from entering the tank during the cleaning process and ensures a controlled working environment. Proper isolation also helps avoid contamination of the water supply.
Step 3: Draining the Water Tank
- Draining Water: The remaining water inside the tank is safely removed using pumps or the tank’s own drainage system.
- Retaining Some Water: Depending on the tank’s size, technicians leave a small amount of water inside to make it easier to remove the settled silt and sludge; the tank is then completely emptied.
- Gaining Full Access: Once all the water is drained, it becomes easy to reach all the interior walls and the floor, ensuring a thorough cleaning.
Step 4: Sludge and Sediment Removal
This is one of the most crucial stages of the cleaning process. Over time, heavy particles settle at the bottom of the tank, forming a thick layer of sludge.
Professional technicians remove the following:
- Mud
- Sand
- Sediment
- Rust particles
- Organic debris
- Mineral deposits
Industrial vacuum machines and sludge extraction equipment are commonly used to remove these materials efficiently.
Step 5: Manual Scrubbing of Tank Walls
Once the sludge has been removed, technicians manually scrub the interior walls, floor, and corners of the tank.
This step removes:
- Biofilm
- Algae
- Dirt
- Stubborn deposits
- Surface stains
Manual scrubbing reaches areas that machines alone cannot clean effectively.
Step 6: High-Pressure Jet Cleaning
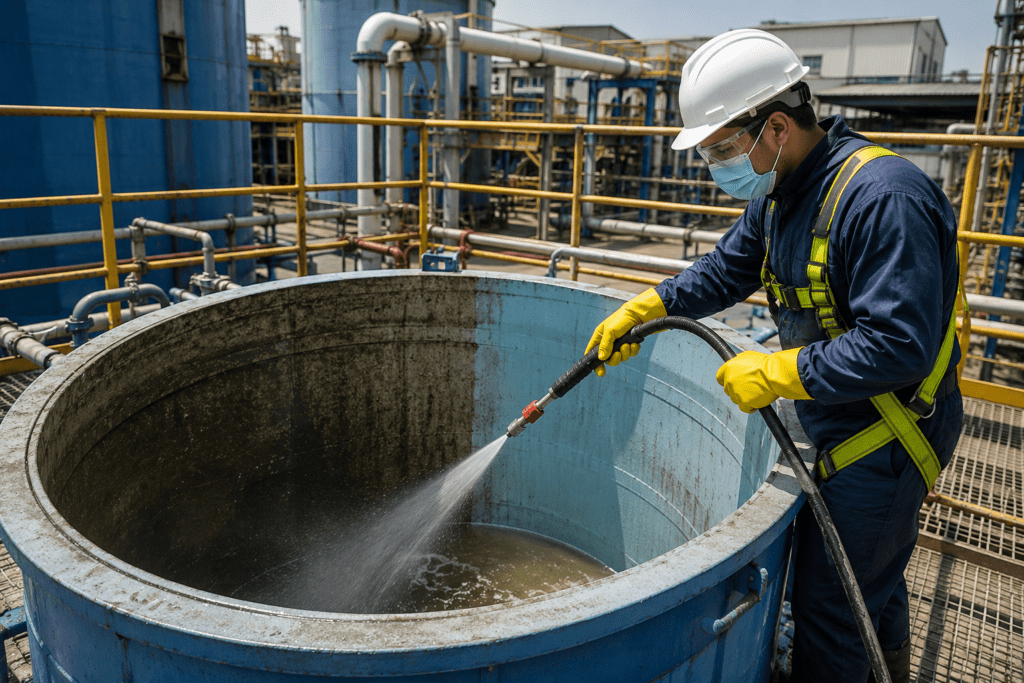
After manual scrubbing, a high-pressure water jet is used to completely wash away the loosened dirt and contaminants.
High-pressure cleaning helps remove the following:
- Remaining Sludge: Residual mud or muck
- Stubborn Stains: Tough, hard-to-remove stains
- Fine Sediment: Tiny soil particles
- Biofilm Residue: Slimy layers or deposits (formed by microorganisms) on the wallsThis process ensures the inner surfaces of the tank are far cleaner than what manual scrubbing alone can achieve.
Step 7: Industrial Vacuum Cleaning
After pressure washing, technicians use industrial wet and dry vacuum equipment to remove the remaining dirty water and debris.
Vacuum cleaning ensures the following:
- No Loose Contaminants Remain: No leftover debris or dirt remains inside.
- Thoroughly Cleaned: The tank is cleaned completely and effectively.
- No Water Stagnation: Dirty water does not accumulate or stagnate inside the tank.
This step prepares the tank for the next stage—sanitization (eliminating germs).
Step 8: Tank Disinfection and Sanitization
While standard cleaning removes visible dirt and grime, the process of sanitization is designed to eliminate invisible microorganisms (microscopic germs). Professional cleaning companies use food-grade disinfectants that are completely safe for water tanks.
The disinfection process helps eliminate the following:
- Bacteria: Disease-causing germs
- Algae Spores: Tiny algae particles (to prevent regrowth)
- Fungi: Mold or mildew growth within the tank
- Biofilm: A thin layer of germs and greasy residue
- Harmful Microorganisms: Other dangerous microscopic pathogens
This stage is crucial for restoring conditions that ensure hygienic and safe water storage within the tank.
Step 9: Final Rinsing
After disinfection, the tank is thoroughly rinsed with clean water to completely remove any residual cleaning solution (disinfectant) and loosened particles.
Before preparing the tank for reuse, all the rinse water is completely drained out.
Step 10: Final Inspection and Quality Check
Before refilling the tank with water, technicians conduct a final inspection.
They check the following:
- Complete Cleanliness: Whether the cleaning has been done thoroughly and correctly.
- Remaining Debris: Whether any traces of dirt or debris remain.
- Structural Damage: Whether there is any internal damage or cracking in the tank.
- Proper Drainage: Whether water drains and flows out correctly.
- Tank Hygiene: Whether the tank is completely hygienic and safe.
- Secure Lid and Fittings: Whether the tank lid and all pipes/fittings are securely tightened and sealed.
If any repair or maintenance issues are identified during the inspection, the property owner is informed so that the necessary repairs can be carried out promptly.
Step 11: Refilling the Tank
After the final inspection is complete, the tank is refilled with clean, fresh water and reconnected to the property’s main water supply system.
At this stage, your tank is fully ready for normal daily use, offering superior cleanliness, hygiene, and improved water quality.
Tips to Keep Your Water Tank Clean After Cleaning Keep the following points in mind to maintain water cleanliness for a long time after cleaning: Always keep the tank lid tightly closed. Prevent sunlight from entering overhead tanks to avoid algae growth. Repair any cracks in the tank immediately upon noticing them. Do not allow dirt and debris to accumulate around the tank. Periodically check the condition of the tank. Schedule a cleaning every six months.
Get the Best Offer
Welcome to Shree Sai Enterprises, your trusted partner for professional cleaning, maintenance, and sanitation services in Mumbai, Navi Mumbai, and Thane. With years of industry experience, we are committed to delivering high-quality, reliable, and affordable solutions for residential, commercial, and industrial spaces.
Our Client











You can check our client review on official link Click Here!
Frequently Asked Questions
How does the water tank cleaning process work?
Professional water tank cleaning involves inspection, draining, sludge removal, scrubbing, pressure washing, vacuum cleaning, disinfection, final inspection, and refilling.
Is disinfection necessary after cleaning?
Yes. Cleaning removes dirt and sludge, while disinfection eliminates bacteria, fungi, algae, and other microorganisms that cannot be seen with the naked eye.
How long does professional water tank cleaning take?
Most residential water tanks are cleaned within 2–4 hours, depending on the size and condition of the tank.
How often should a water tank be professionally cleaned?
Experts recommend cleaning water storage tanks every six months to maintain clean and hygienic water.
Final Thoughts:
A clean water tank is the foundation of a safe water supply. While sediment, sludge, algae, and bacteria naturally accumulate over time, a systematic professional cleaning process restores the tank to a hygienic condition and helps protect the quality of the water you use every day.
Understanding the water tank cleaning process also helps property owners appreciate the importance of each step—from inspection and sludge removal to sanitization and final quality checks. Rather than waiting for visible contamination or unpleasant odors, scheduling routine professional cleaning every six months is the best way to ensure clean water, extend the life of your storage tank, and reduce long-term maintenance costs.
Whether you own a residential property, commercial building, housing society, hotel, hospital, or industrial facility, following a regular water tank cleaning schedule is a simple yet essential investment in health, hygiene, and peace of mind.